In previous post I’ve written about how to use SSH client. Now we’ll take a look a bit how SSH Daemon (server) works.
From previous post, you should have a running VM with Ubuntu or some other flavour of Linux, with sshd running. You
should also know the IP address of that VM.
Right now, you can SSH into that VM and it will ask you for a password, just as if you were going to log in into that machine with command line.
$ ssh ubuntu@192.168.0.5
ubuntu@192.168.0.5's password:
Welcome to Ubuntu 16.04.4 LTS (GNU/Linux 4.4.0-116-generic x86_64)
ubuntu@ubuntu:~$
But this approach is not the most secure. The alternative is to use key-based authentication.
So, the steps we must take are:
- Create SSH keys;
- Put the generated public key to the server;
- Disable the password authentication (since we can now login with generated keys);
- Restart SSH service.
Create SSH Keys
On you local machine, generate an SSH key pair:
$ ssh-keygen
Generating public/private rsa key pair.
Enter file in which to save the key (/home/ubuntu/.ssh/id_rsa):
Just press enter, you will be prompted to enter a passphrase:
Enter passphrase (empty for no passphrase):
Enter same passphrase again:
Your identification has been saved in /home/user/.ssh/id_rsa.
Your public key has been saved in /home/user/.ssh/id_rsa.pub.
As the first line suggests - “empty for no passphrase” - just press enter, and then enter again. Now you have created
SSH keys that are stored in your ~/.ssh/ directory.
CAUTION: If you had SSH keys from before, you will be prompted to overwrite them. If you want to overwrite them (which I don’t suggest), back them up first.
Embedding Public Key to the server
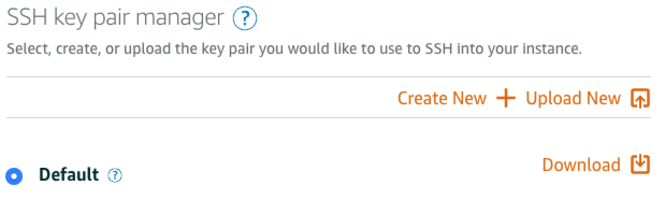
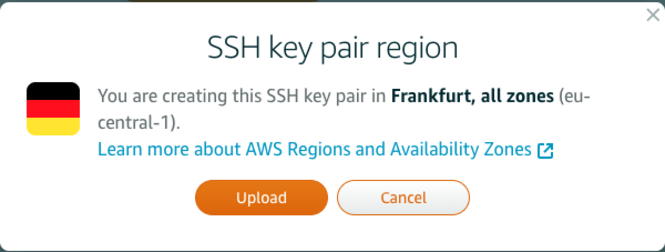
If you’re using AWS (for example a Lightsail instance), upon creating the server, you can embed your public key to the server from AWS Console. Following are the steps for AWS Console when creating an Lightsail instance:
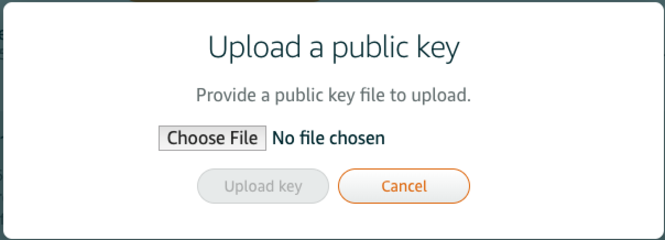
Click “Choose File” and pick the id_rsa.pub. That’s it.
For VM, or for an existing server, you can use ssh-copy-id tool, and it will copy the key to the server (in this step,
password authentication for SSH needs to be enabled):
$ ssh-copy-id ubuntu@192.168.0.5
/usr/bin/ssh-copy-id: INFO: Source of key(s) to be installed: "/home/user/.ssh/id_rsa.pub"
/usr/bin/ssh-copy-id: INFO: attempting to log in with the new key(s), to filter out any that are already installed
/usr/bin/ssh-copy-id: INFO: 1 key(s) remain to be installed -- if you are prompted now it is to install the new keys
ubuntu@192.168.43.7's password:

Number of key(s) added:        1

Now try logging into the machine, with:   "ssh 'ubuntu@192.168.43.7'"
and check to make sure that only the key(s) you wanted were added.
This command copied content of ~/.ssh/id_rsa.pub to the server in a secure way. Now, you can see your id_rsa.pub on
the server within ~/.ssh/authorized_keys file.
You can copy the content manually as well.
Once this is done, you can login to the remote machine without password.
$ ssh ubuntu@192.168.43.7
Welcome to Ubuntu 16.04.4 LTS (GNU/Linux 4.4.0-116-generic x86_64)
ubuntu@ubuntu:~$
Using SCP
Now you can also use SCP the same way you’re using SSH to upload/download files to/from the server without typing a password.
Disabling Password Authentication
You can login every time to the remote server (from machine you copied id_rsa.pub) without a password, but everyone
else can login with the password. We want to disable the password authentication (or maybe you don’t, follow the next
step for that Still want to use a password?).
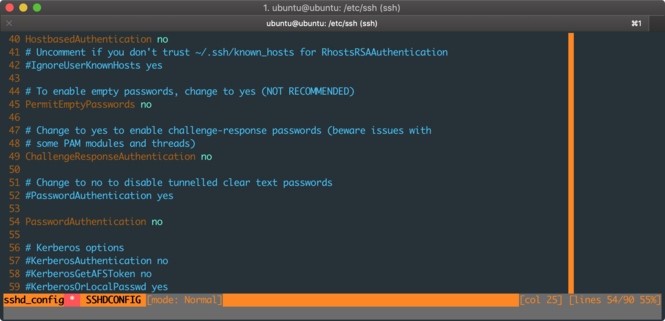
On your server, go to /etc/ssh/ and open sshd_config with nano or vim. Find the line with PasswordAuthentication
and follow the sample below, the first two lines are the existing ones, and they are commented, so just add the last
line:
# Change to no to disable tunnelled clear text passwords
#PasswordAuthentication yes

PasswordAuthentication no
Once complete, just restart the sshd service by issuing:
$ sudo service sshd restart

# you can say 'ssh' instead of 'sshd', it will work the same
$ sudo service ssh restart

# issue the command below to see the status - it should be active (running)
$ sudo service sshd status
Still want to use a password?
If you still want to use a password, I would strongly suggest you make a complex password and that you install fail2ban. Configure it so that for example to have three attempts to log in, and then block the IP address for five or ten minutes. This will protect you from brute force attacks.
Conclusion
Now you have SSH key-based access to your server, you don’t have to remember the password, and you’re protected from attacks. If you haven’t checked my previous post about SSH Client, make sure you check it out.